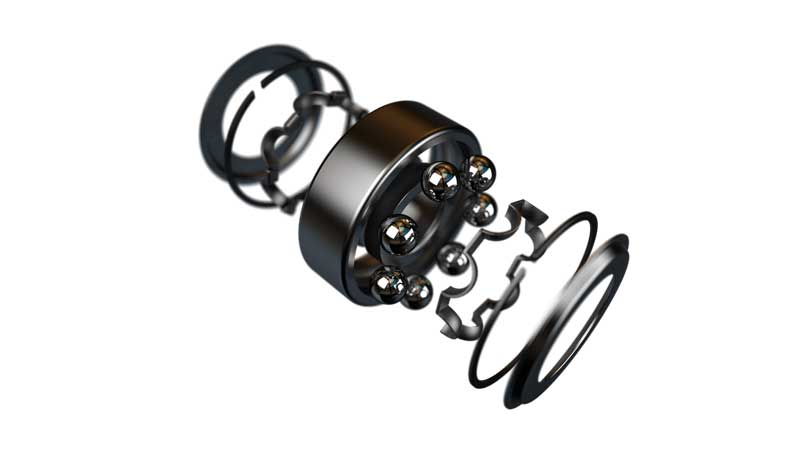
Today we are taking a look at a particularly fiddly part of fishing reel maintenance – the cleaning of reel bearings.
They are small and irritatingly easy to drop and lose somewhere on the floor if you are not careful.
Hopefully, we can give you some tips on the best way to go about the cleaning process.
Step by Step Guide to Cleaning Reel Bearings
Step 1: Prepare Your Workspace
Make sure you have a clear workspace devoid of any other items so that you can clearly see the bearings, and the rubber seals that you are going to take out of the bearing. We would recommend having a soft, white cloth on the worksurface so you can clearly see the parts.
Step 2: Remove Rubber Seals with A Utility Or Precision Knife
If your bearings have a rubber seal, these can be prised off the bearing using a precision knife. Whether you put the rubber seal back onto the bearing is optional, as the bearing can run without them if you have used the right lube and oil.
Run your precision knife around the edge of the rubber seal, and you should find it easily popping out.
Do not forget to do both sides.
Step 3: Put Your Bearing into A Container
Use something like a small clean sandwich box if you have one around and place the bearings inside.
Step 4: Add Your Bearing Cleaner
Tilt the box to the side so the bearings are nicely nestled into the corner. This will allow you to get the bearing coated with cleaner without having to fill the entire container.
Cover your bearings with the cleaner.
Step 5: Vibrate the Bearings
Using a machine like a hair trimmer, or something similar that will agitate the bearings, hold the machine and container together for 2-3 minutes.
The vibrations will agitate the bearings and ensure that any dirt or grit is removed more efficiently.
A similar vibrating technique is used for cleaning jewellery.
Step 6: Allow Bearings to Dry
If you are able to do this using pressurised air, then this would be quicker. If not, allow them to dry naturally on your clean cloth.
Step 7: Soak the Bearings in A Protective Soak
In a clean container, add some protective bearing soak, and place the bearings in it. Leave them for 15 minutes.
Step 8: Remove Bearings from Soak And Allow Them To Dry
Again, if you are able to use pressurised air to dry the bearings, do so. If not, allow them to dry naturally.
Step 9: Oil Your Bearings
This should be done using no more than a drop of oil. If possible, use a precision dropper to do this, as too much oil can cause problems. Once you have a drop in the bearing hole, use a swab to ensure the bearing is nicely coated.
Step 10 (Optional): Pop the Rubber Seals Back in Place
As we said earlier, if you want to put them back on (assuming your bearings have them) you can, but it is not a necessity.
Step 11: Install Your Bearing Back in Your Reel.
And that is the end of the step by step guide. Once you get the hang on this process it will become like second nature!
